How to make a GIF
 In this article I want to explain how to make a gif. A “gif” is an image format which takes up very few space and hence is often used for website creation. Be aware that gif format images tend to display gradients in a rather ugly way due to the way they save the image information. If you have images with gradients or photos I recommend using jpg as your image format of choice.
If you want to create a simple gif you choose the grafik program of your liking and while using “save as …” just choose “gif” as your file type and you’re done with it. But if you’re looking for how to make gifs you most likely want to create an animated gif resulting in animated pictures.
How do you make a gif?
In this case you first need an appropriate program which can handle animated gifs. I recommend Photoshop or Adobe Imageready.
If you don’t have any of those fancy programs there are tons of tools where you can make a gif online. You just have to upload some pictures and the animated gif maker will create your animated gif right away for free.
How to make a gif in Photoshop
Step 1: Create a “New File” (Ctrl+N) and choose the image to be of the same size as the pictures you want to animate. If you want to create an avatare I recommend 150×150 px or 200x200px depending on the rules of the online community where you want to use it.
Step 2: Open all the images you want to use in your gif animation. You can just open the folder, select the images you want and drag and drop them over to the workspace of Photoshop (lets call them “Image 1″ to “Image 6″ for the sake of clarity.
Step 3: Every movie consists of several time frames that’s the same for your animated gif. Hence, to create an animated gif we want to create each picture in a new layer and each layer as one timeframe. If the animation toolbar is not already there click “Windows” and then “Animation” which will give you full control over the frames. The animation toolbar will pop up at the lower left corner of your screen being empty by default.
Step 4: Select the “move tool” and use it to drag and drop every image 1 to 6 to your “New File” and position them as you like. Now each image has its own layer but up to now they all exist in the same timeframe, which you can see in your animation toolbar.
Step 5: For easy working close all images but the “New File”.
Step 6: Now we want to transform our layers into timeframes. In the upper right corner of the animation toolbox you’ll find a tiny little arrow pointing down. Once you click it a menu will pop up where you can choose “Make frames from layers“. If you click this option every layer consisting of one of our images 1 to 6 now lives in its own timeframe. You can already watch your animation. Just hit the play button in the lower left corner. If you take the default values the result will be a quite fast moving image and hence most likely very annoying. We’ll get to that in step 8.
Step 7 (optional): If your animation toolbar is showing you little previews of your images and hence timeframes your’re good to go. If not click on the tiny arrow again and choose “Convert to frame animation” for easier use.
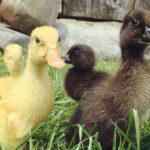
Step 8: Within the timeframe in the animation toolbox right beneath each of your images 1 to 6 some tiny numbers are showing which state the amount of time the corresponding timeframe will live. You can get a preview on what your animated gif will look like when you hit the “Play-button” beneath the frames. If you take the default values the result will be quite fast and hence most likely very annoying. Change all the numbers to at least 0.5 seconds just as I did for the animated gif in this article. As you can see even 0.5 seconds can get a little annoying after a while. Hence I recommend even longer time intervals if you use separate images. Hit “Play” again to check your result.
Step 9: To save your animation go to “File”, choose “Save for web”, choose “gif” as your file format, hit “save”, choose a name and save your animated gif file.
How to make a gif in Imageready
The process works exactly the same if you use Imageready. Just go through the steps above only the menu items might be named a little different and you can skip step 8.
Congratulations now you know how to make a gif and can create your own animated gif with any images you like.

